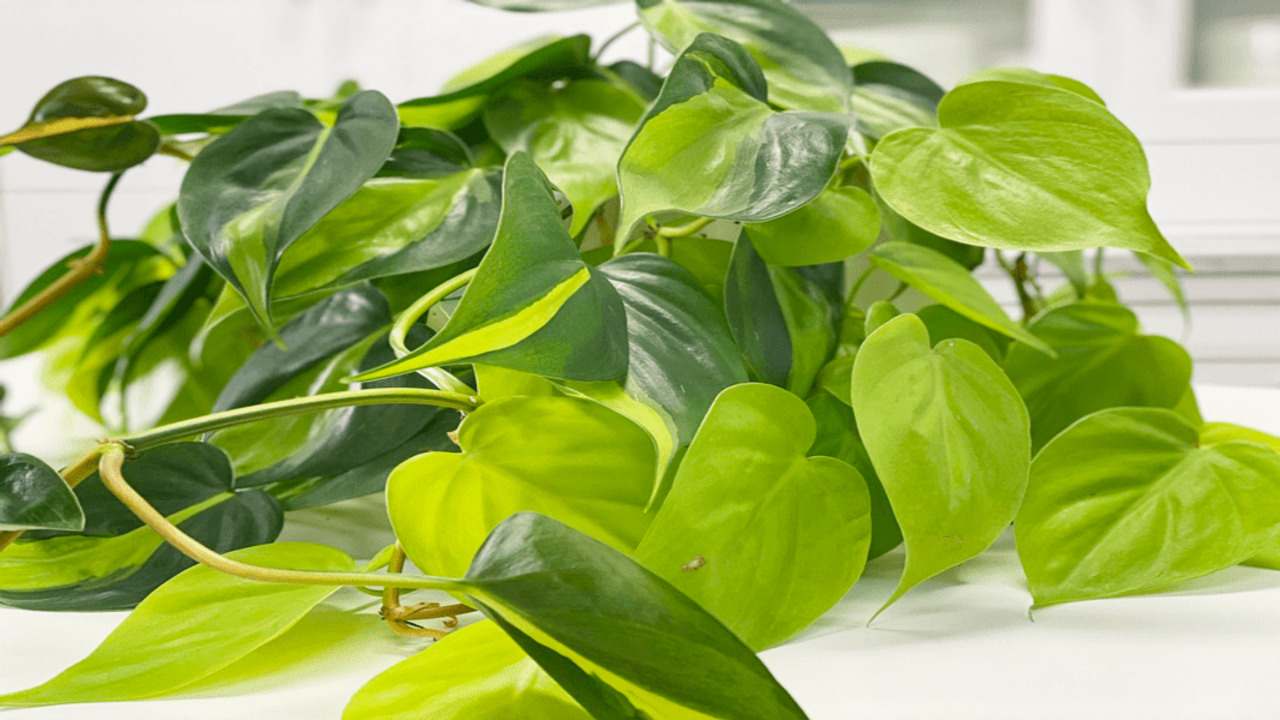
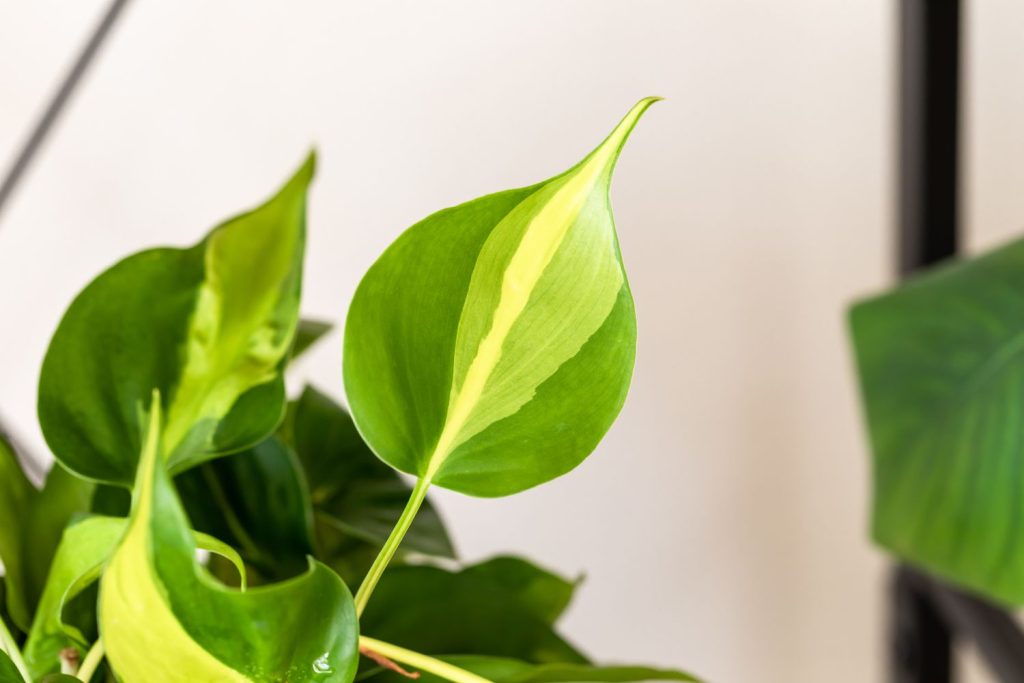
Philodendron Brasil, a striking variety of the Philodendron hederaceum, features heart-shaped leaves with vibrant green and yellow variegation. This tropical plant is popular for its easy care and rapid growth, making it a favorite among both novice and experienced plant enthusiasts. Native to Central and South America, Philodendron Brasil thrives in indoor environments with indirect light, moderate humidity, and well-draining soil. Its hardy nature allows it to adapt to various conditions, and with proper care, it can flourish beautifully. Additionally, this plant can be propagated easily, offering a rewarding experience for those looking to expand their indoor garden.
| Common Name | Philodendron Brasil |
| Botanical Name | Philodendron hederaceum ‘Brasil’ |
| Family | Araceae |
| Plant Type | Perennial, vine |
| Mature Size | 4-6 ft. tall, 1-6 ft. wide |
| Sun Exposure | Partial, shade |
| Soil Type | Moist but well-drained |
| Soil pH | Acidic, neutral |
| Hardiness Zones | 10-12 (USDA) |
| Native Area | Central America, Caribbean |
| Toxicity | Toxic to people, pets |
How to Grow & Care of Philodendron Brasil
Let’s discuss how you can easily grow Philodendron Brasil easily anywhere in what kind of conditions:
Choosing the Right Location for Your Philodendron Brasil
Philodendron Brasil thrives in a well-lit environment with indirect sunlight. It’s essential to place your plant in a location where it receives bright, filtered light just like Philodendron Rugosum needs to grow directly under sunlight. Direct sunlight can scorch the leaves, leading to browning and damage. If natural light is insufficient, consider using fluorescent lights to supplement. This plant adapts well to various light conditions, but for optimal growth, a spot near an east or west-facing window is ideal. Additionally, rotating the plant every few weeks ensures even growth and prevents it from leaning towards the light source.
Ideal Soil and Potting Mix for Philodendron Brasil
Choosing the right soil and potting mix is crucial for the health of your Philodendron Brasil. This plant prefers a well-draining, aerated potting mix that retains some moisture without becoming waterlogged. A mix of peat moss, perlite, and regular potting soil works well. Ensure the pot has drainage holes to prevent root rot. Regularly check the soil’s pH, aiming for a slightly acidic to neutral range (5.5-7.0). Repotting every 1-2 years with fresh soil helps maintain nutrient levels and encourages healthy root development.
Watering Schedule and Humidity Requirements
Proper watering is vital for the growth of Philodendron Brasil. Water the plant when the top inch of soil feels dry to the touch. Overwatering can lead to root rot, while underwatering can cause leaf wilting and browning. During the growing season (spring and summer), you may need to water more frequently, while in the dormant season (fall and winter), reduce watering. Philodendron Brasil also benefits from higher humidity levels. Maintain humidity around 60-70% by misting the leaves, using a humidifier, or placing a tray of water near the plant.
Fertilizing Your Philodendron Brasil for Optimal Growth
Regular fertilization promotes healthy growth and vibrant foliage. Use a balanced, water-soluble fertilizer with equal parts nitrogen, phosphorus, and potassium (NPK 10-10-10) every 4-6 weeks during the growing season. Avoid fertilizing during the dormant winter months as the plant’s growth slows down. Over-fertilizing can lead to salt build-up in the soil, causing leaf burn. Dilute the fertilizer to half the recommended strength to prevent over-fertilization. Organic options like compost tea or worm castings can also provide essential nutrients without the risk of chemical build-up.
Pruning and Training Your Philodendron Brasil
Pruning helps maintain the shape and size of your Philodendron Brasil, promoting fuller growth. Regularly trim any yellow, damaged, or leggy stems to encourage new growth. Use clean, sharp scissors or pruning shears to make clean cuts just above a leaf node. Philodendron Brasil and Philodendron Melanochrysum both have striking, glossy leaves with varying shades of green, contributing to their ornamental value.This plant can also be trained to climb a moss pole or trellis, mimicking its natural habitat. Secure the vines gently to the support structure using plant ties or soft twine. Pruning also allows you to propagate cuttings, further expanding your plant collection.
Pruning Your Philodendron Brasil
Pruning and training your Philodendron Brasil is essential for maintaining its health, shape, and size. Here’s a comprehensive guide:
- Why Prune?
- Control Growth: Keeps the plant from becoming too leggy or overgrown.
- Health: Removes dead or yellowing leaves and encourages new growth.
- Shape: Helps in maintaining a desired shape and prevents the plant from becoming unruly.
- When to Prune?
- Regular Maintenance: Any time of the year, but primarily during the growing season (spring and summer).
- After Bloom: If your plant has bloomed, prune after flowering to encourage new growth.
- How to Prune?
- Tools: Use clean, sharp scissors or pruning shears to avoid infection.
- Technique: Cut just above a leaf node (where the leaf joins the stem) to encourage bushier growth. Remove any yellow or damaged leaves by cutting them off at the base of the stem.
- Tip Pruning: To encourage bushier growth, pinch or trim the tips of the vines. This will stimulate the plant to produce more branches.
Training Your Philodendron Brasil
- Why Train?
- Aesthetic Appeal: Creates a more attractive plant shape.
- Space Management: Helps the plant grow in a desired direction, making it suitable for various spaces.
- Health: Improves air circulation around the plant, reducing the risk of disease.
- Methods of Training:
- Trellis or Moss Pole: Encourage the plant to climb by attaching it to a support structure.
- Hanging Basket: Let the vines trail down for a cascading effect.
- Wall Training: Use wall hooks or command strips to attach the vines and create a green wall effect.
- How to Train?
- Trellis or Moss Pole: Gently tie the vines to the support using plant ties, string, or soft plant tape. Ensure the ties are not too tight to avoid damaging the stems.
- Hanging Basket: Allow the vines to naturally trail down. You can occasionally rotate the basket to ensure even growth.
- Wall Training: Use hooks or clips to guide the vines along a desired path. Be careful not to damage the plant when attaching it.
Additional Tips
- Light: Ensure your Philodendron Brasil gets bright, indirect light to thrive. Too much direct sunlight can scorch the leaves, while too little light can make it leggy.
- Watering: Keep the soil consistently moist but not waterlogged. Allow the top inch of soil to dry out between waterings.
- Fertilizing: Feed your plant with a balanced liquid fertilizer every 4-6 weeks during the growing season.
- Humidity: Philodendron Brasil prefers higher humidity levels. Mist the plant occasionally or use a humidifier to maintain adequate humidity.
By following these pruning and training tips, you can keep your Philodendron Brasil healthy, attractive, and well-shaped.
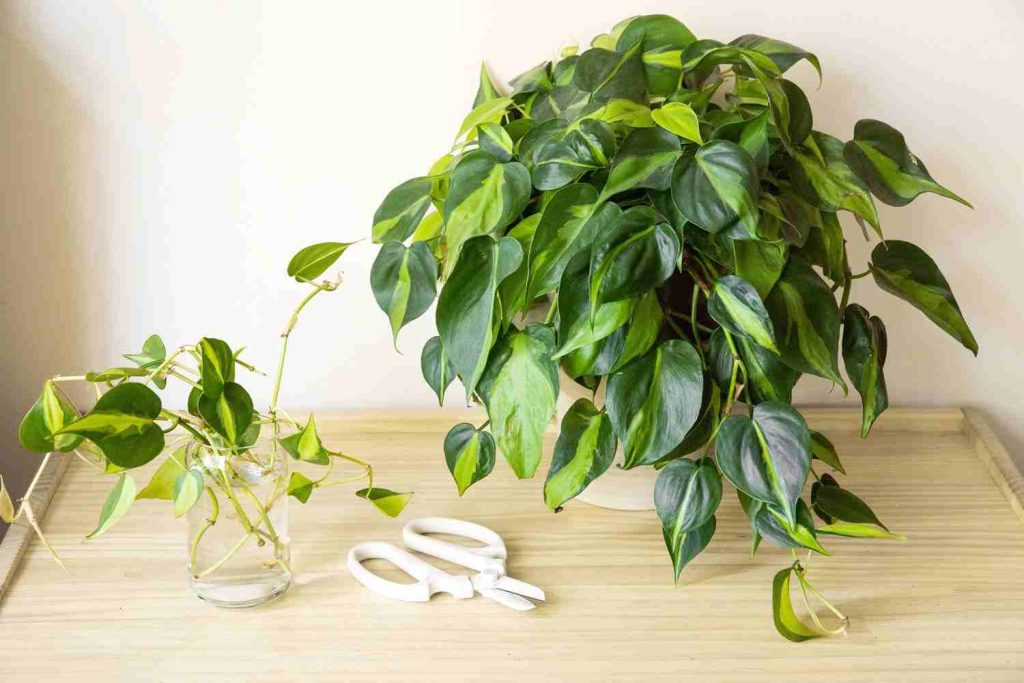
Propagation Methods for Philodendron Brasil
Now we’ll explore various propagation methods and tools to help you successfully grow new Philodendron Brasil plants.

Essential Tools and Materials
Before you start propagating your Philodendron Brasil, gather the following tools and materials:
- Sharp scissors or pruning shears
- Clean containers (glass jars or plastic pots)
- Fresh water
- Potting soil
- Sphagnum moss
- Plastic bags or plastic wrap
- Rooting hormone (optional)
- Plant labels (optional)
Water Propagation Method
Steps for Water Propagation
- Select a Healthy Stem: Choose a healthy stem with at least two nodes and a few leaves.
- Cut the Stem: Using sharp scissors, cut the stem just below a node.
- Remove Lower Leaves: Remove the leaves from the bottom node to avoid rotting.
- Place in Water: Place the stem in a clean glass jar filled with water, ensuring the nodes are submerged.
- Change Water Regularly: Change the water every few days to prevent bacterial growth.
- Monitor Root Growth: Roots will start to develop in a few weeks. Once they are a few inches long, the cutting can be transplanted into soil.
Tips for Successful Water Propagation
- Use a transparent container to monitor root growth easily.
- Keep the cutting in a bright, indirect light location.
- Ensure the water level is adequate to cover the nodes.
Soil Propagation Method
Steps for Soil Propagation
- Prepare the Pot: Fill a small pot with well-draining potting soil.
- Select and Cut a Stem: Choose a healthy stem with at least one node and cut it below the node.
- Apply Rooting Hormone (optional): Dip the cut end in rooting hormone to encourage faster root growth.
- Plant the Cutting: Insert the cutting into the soil, ensuring the node is buried.
- Water Thoroughly: Water the soil until it is moist but not waterlogged.
- Cover with Plastic: Cover the pot with a plastic bag to create a humid environment.
- Monitor and Care: Place the pot in a warm, bright location with indirect light. Keep the soil moist until roots develop.
Tips for Successful Soil Propagation
- Use a pot with drainage holes to prevent waterlogging.
- Avoid direct sunlight to prevent overheating and drying out.
- Check the soil moisture regularly to maintain consistent humidity.
Sphagnum Moss Propagation Method
Steps for Sphagnum Moss Propagation
- Prepare the Moss: Soak sphagnum moss in water until it is thoroughly moist.
- Select and Cut a Stem: Choose a healthy stem and cut it below a node.
- Wrap the Node: Wrap the moist sphagnum moss around the node and secure it with plastic wrap or a small plastic bag.
- Wait for Roots to Develop: Roots will begin to form within a few weeks. Once substantial roots have formed, the cutting can be planted in soil.
Tips for Successful Sphagnum Moss Propagation
- Ensure the moss remains consistently moist but not waterlogged.
- Keep the wrapped cutting in a warm, bright location with indirect light.
- Check for root development periodically and transplant to soil once roots are established.
Air Layering Propagation Method
Steps for Air Layering Propagation
- Select a Healthy Stem: Choose a mature, healthy stem on the mother plant.
- Make a Small Cut: Make a small cut or notch just below a node on the stem.
- Apply Rooting Hormone (optional): Apply rooting hormone to the cut area.
- Wrap with Moss: Wrap moist sphagnum moss around the cut and cover it with plastic wrap or aluminum foil.
- Secure the Wrap: Secure the wrapping with tape or twist ties.
- Wait for Roots: Roots will develop in a few weeks. Once roots are visible through the moss, cut below the new roots and plant the new cutting in soil.
Tips for Successful Air Layering Propagation
- Keep the moss moist throughout the rooting process.
- Check for root development without disturbing the wrapping.
- Transplant the new plant carefully to avoid damaging the delicate roots.
Common Issues and Troubleshooting
- Yellowing Leaves: This can be a sign of overwatering or insufficient light.
- Rotting Cuttings: Ensure the water is changed regularly and the soil is not waterlogged.
- Slow Root Growth: Provide consistent warmth and humidity to encourage faster rooting.
Common Pests and Diseases of Philodendron Brasil
Philodendron Brasil, a popular houseplant known for its attractive, variegated foliage, can fall victim to various pests and diseases. Understanding these issues and how to manage them is crucial for maintaining a healthy plant. Here, we delve into the common pests and diseases that can affect Philodendron Brasil, providing detailed insights and solutions.
1. Spider Mites
Identification
Spider mites are tiny, spider-like arachnids that can be red, green, or yellow. They are often found on the undersides of leaves, where they spin fine webs.
Symptoms
- Yellowing Leaves: Leaves may start to yellow and have small, white or yellow speckles.
- Webbing: Fine webbing on the undersides of leaves or between stems.
- Leaf Drop: Severe infestations can cause leaves to drop prematurely.
Treatment
- Water Spray: Regularly misting the plant or rinsing it with water can dislodge mites.
- Insecticidal Soap: Apply insecticidal soap or neem oil to affected areas.
- Isolation: Keep infected plants away from healthy ones to prevent the spread.
2. Mealybugs
Identification
Mealybugs are small, white, cotton-like insects that often gather in clusters on stems and leaf joints.
Symptoms
- White Fluffy Masses: Presence of white, cottony masses on the plant.
- Sticky Residue: Leaves may feel sticky due to honeydew excreted by mealybugs.
- Yellowing and Wilting: Infested plants may yellow and wilt.
Treatment
- Manual Removal: Remove mealybugs with a cotton swab dipped in alcohol.
- Neem Oil: Apply neem oil or insecticidal soap regularly.
- Pruning: Remove heavily infested parts of the plant.
3. Scale Insects
Identification
Scale insects are small, brown or gray pests that attach themselves to stems and leaves, appearing as tiny bumps.
Symptoms
- Yellowing Leaves: Leaves may turn yellow and drop off.
- Sticky Honeydew: Presence of a sticky substance on leaves and surfaces around the plant.
- Sooty Mold: Growth of black, sooty mold on honeydew.
Treatment
- Alcohol Wipes: Wipe affected areas with a cloth soaked in rubbing alcohol.
- Horticultural Oil: Apply horticultural oil to suffocate the insects.
- Pruning: Cut off heavily infested areas.
4. Aphids
Identification
Aphids are small, green, black, or brown insects that cluster on new growth and undersides of leaves.
Symptoms
- Deformed Leaves: Leaves may curl or become distorted.
- Sticky Honeydew: Leaves and surrounding surfaces may become sticky.
- Ant Activity: Increased ant presence as they feed on the honeydew.
Treatment
- Water Spray: Blast aphids off with a strong stream of water.
- Insecticidal Soap: Use insecticidal soap or neem oil.
- Companion Plants: Introduce natural predators like ladybugs.
5. Root Rot
Identification
Root rot is a fungal disease caused by overwatering or poor drainage, leading to decayed roots.
Symptoms
- Wilting: Despite adequate watering, the plant wilts.
- Yellow Leaves: Leaves turn yellow and fall off.
- Blackened Roots: Roots appear black, mushy, and emit a foul odor.
Treatment
- Repotting: Remove the plant from its pot, trim away affected roots, and repot in fresh, well-draining soil.
- Reduce Watering: Water only when the top inch of soil is dry.
- Fungicide: Apply a fungicide to the roots before repotting.
6. Leaf Spot Disease
Identification
Leaf spot disease is caused by fungal or bacterial pathogens, leading to spotted foliage.
Symptoms
- Brown or Black Spots: Presence of brown or black spots on leaves.
- Yellow Halo: Spots may be surrounded by a yellow halo.
- Leaf Drop: Affected leaves may fall prematurely.
Treatment
- Remove Infected Leaves: Prune away and dispose of infected leaves.
- Improve Air Circulation: Ensure good air circulation around the plant.
- Fungicide: Apply a suitable fungicide to prevent further spread.
7. Bacterial Blight
Identification
Bacterial blight is a serious disease caused by bacteria that infect leaves and stems.
Symptoms
- Water-soaked Lesions: Leaves develop water-soaked, dark lesions.
- Wilting: The plant may wilt and show signs of distress.
- Foul Smell: Infected areas may emit a foul odor.
Treatment
- Isolate: Immediately isolate the infected plant.
- Pruning: Remove and destroy infected plant parts.
- Copper-based Fungicide: Apply a copper-based fungicide to control the spread.