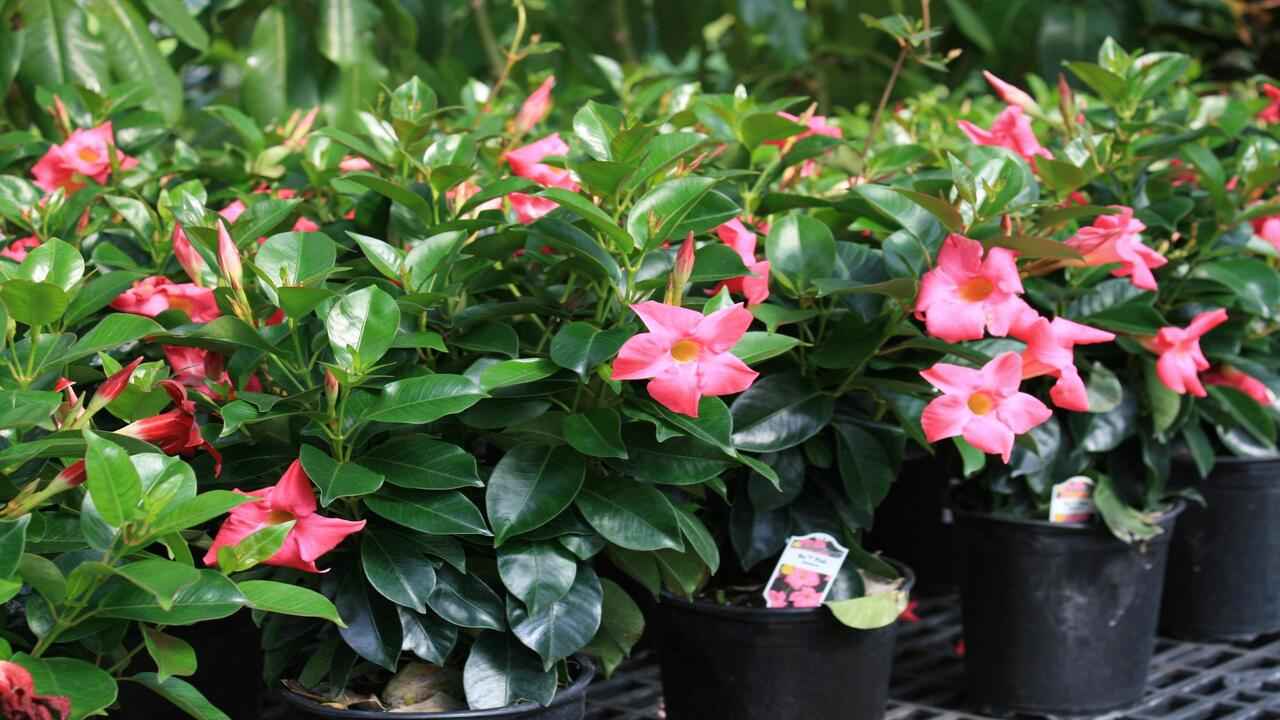
Dipladenia, often mistaken for Mandevilla, is a tropical, evergreen vine known for its vibrant, trumpet-shaped flowers in hues of red, pink, and white. Native to South America, it thrives in warm climates, making it a popular choice for adding a touch of the tropics to gardens and patios. Dipladenia is relatively easy to grow and care for, requiring well-drained soil, regular watering, and plenty of sunlight. Propagation is typically done through stem cuttings. Beyond its aesthetic appeal, Dipladenia attracts pollinators like bees and hummingbirds, enhancing the biodiversity of your garden.
| Common Name | Dipladenia |
|---|
| Botanical Name | Mandevilla sanderi |
| Family | Apocynaceae |
| Plant Type | Evergreen perennial, often grown as annual |
| Mature Size | 1-2 ft. tall, 1-2 ft. wide |
| Sun Exposure | Full sun |
| Soil Type | Well-draining, sandy or loamy |
| Soil pH | Slightly acidic to neutral |
| Bloom Time | Spring to fall |
| Flower Color | Red, pink, white, yellow |
| Hardiness Zones | 9-11 (USDA) |
| Native Area | South America |
| Toxicity | Toxic to pets |
How to Grow & Care for Dipladenia?
Following is a complete guide to growing and caring Dipladenia easily anywhere:
Selecting the Right Location
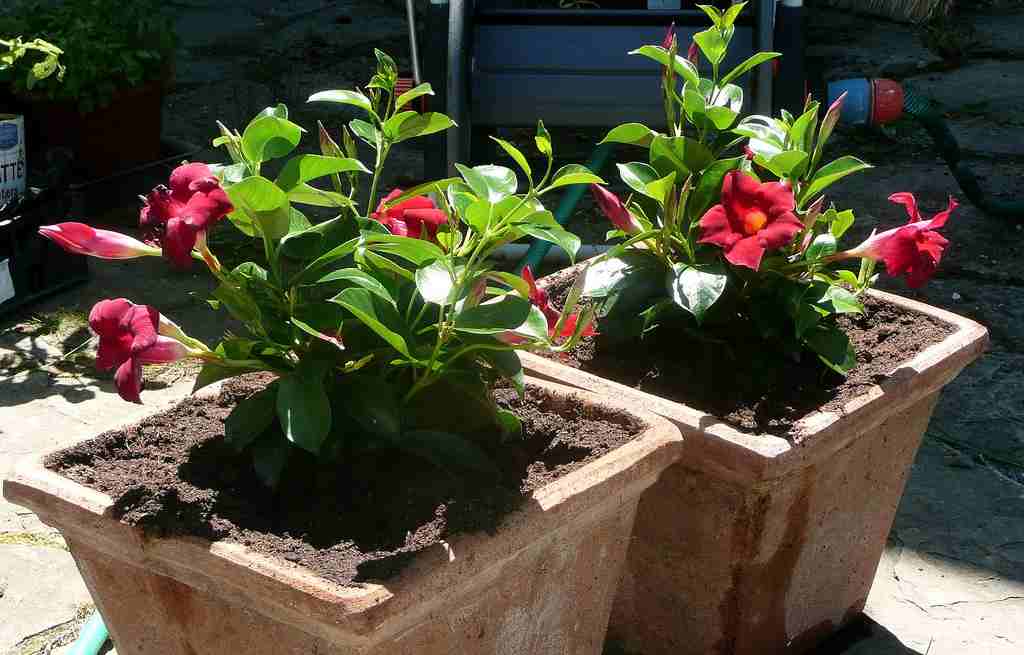
Dipladenia thrives in warm, sunny locations with partial shade. Choose a spot that receives at least 4-6 hours of direct sunlight each day. These tropical plants prefer a location protected from strong winds. If planting in containers, ensure they can be moved indoors during cooler months, as Dipladenia is sensitive to frost. The ideal temperature range is between 60-75°F (15-24°C). Providing a trellis or support structure can help guide the plant’s growth, making it easier to manage its climbing habit and showcase its vibrant, trumpet-shaped flowers.
Soil Preparation
Dipladenia requires well-draining soil to prevent root rot. Use a high-quality potting mix enriched with organic matter. If planting in the ground, amend heavy clay or sandy soils with compost or peat moss to improve drainage and nutrient content. Ensure the soil pH is slightly acidic to neutral, around 6.0-7.0. Adding perlite or coarse sand can further enhance drainage. Prior to planting, loosen the soil to a depth of 12-15 inches to allow roots to establish more easily. Consistent soil moisture is crucial, so avoid areas that are prone to waterlogging.
Planting Dipladenia
Plant Dipladenia in the spring after the last frost has passed. If using containers, select pots with drainage holes to prevent water accumulation. Dig a hole twice as wide and the same depth as the root ball. Gently remove the plant from its container and place it in the hole, ensuring the top of the root ball is level with the soil surface. Backfill with soil, pressing down gently to eliminate air pockets. Water thoroughly to settle the soil. For container planting, place a layer of gravel at the bottom for additional drainage, then fill with prepared soil mix.
Watering Requirements
Dipladenia prefers consistent moisture but is drought-tolerant once established. Water deeply when the top inch of soil feels dry. During the growing season, water more frequently, especially in hot, dry weather. Reduce watering in the fall and winter when the plant’s growth slows. Ensure the soil is evenly moist but not waterlogged. In containers, water until it drains out the bottom, then empty the saucer to prevent root rot. Mulching around the base of the plant can help retain moisture and regulate soil temperature, promoting healthier growth.
Fertilizing
Regular feeding is essential for Dipladenia’s vibrant growth and abundant blooms. Use a balanced, water-soluble fertilizer every 2-3 weeks during the growing season (spring through early fall). A formula high in phosphorus, like a 10-20-10 blend, encourages blooming. Dilute the fertilizer according to the package instructions and apply it to moist soil to prevent root burn. In the winter, reduce fertilization as the plant enters dormancy. Over-fertilizing can lead to lush foliage with fewer flowers, so follow recommended guidelines to ensure a balanced nutrient supply.
Pruning and Training
Pruning Dipladenia helps maintain its shape and encourages bushier growth. Prune in early spring before new growth begins, removing any dead or damaged stems. Cut back long, leggy vines to promote lateral branching. Regularly pinch off the tips of new growth to encourage a fuller appearance. Use clean, sharp pruning shears to make clean cuts just above a leaf node. For climbing varieties, train the plant onto a trellis or support by gently tying the vines as they grow. Regular pruning and training help manage the plant’s size and shape, enhancing its ornamental appeal like China Doll Plants they both look beautiful.
How to propagate Dipladenia?
Propagating Dipladenia, a tropical plant known for its vibrant trumpet-shaped flowers, can be done through stem cuttings. Here’s a step-by-step guide to propagate Dipladenia:
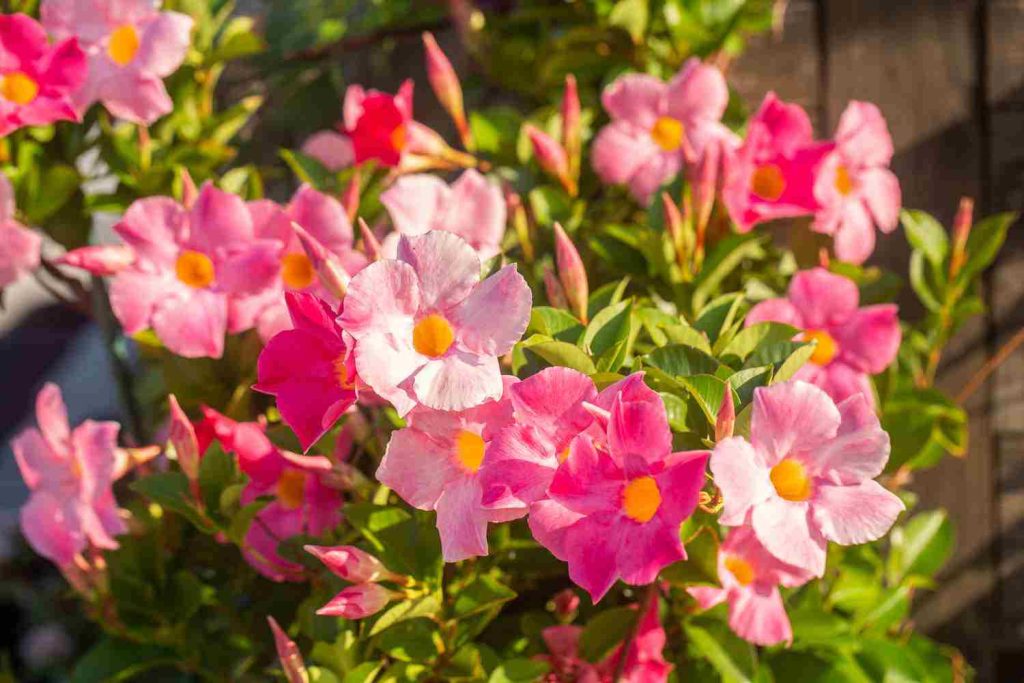
Materials Needed:
- Sharp, sterilized pruning shears or scissors
- Rooting hormone (optional)
- Small pots or containers
- Potting mix (well-draining soil)
- Plastic bag or humidity dome
- Spray bottle with water
Steps to Propagate Dipladenia:
- Select Healthy Cuttings:
- Choose a healthy, non-flowering stem from the parent plant.
- Ensure the stem is at least 4-6 inches long and has a few sets of leaves.
- Take the Cutting:
- Using sterilized shears, make a clean cut just below a node (the point where a leaf attaches to the stem).
- Remove the lower leaves, leaving 2-3 sets of leaves at the top.
- Prepare the Cutting:
- Optional: Dip the cut end of the stem in rooting hormone to encourage root development.
- Shake off any excess rooting hormone.
- Plant the Cutting:
- Fill a small pot or container with well-draining potting mix.
- Make a hole in the soil with your finger or a pencil and insert the cutting about 2 inches deep.
- Firm the soil around the cutting to hold it in place.
- Provide Humidity:
- Cover the cutting with a plastic bag or a humidity dome to maintain high humidity.
- Ensure the plastic does not touch the leaves by using stakes or a small frame.
- Watering:
- Mist the cutting with water using a spray bottle to keep the soil moist but not waterlogged.
- Check the soil regularly and water when the top inch feels dry.
- Provide Proper Conditions:
- Place the pot in a warm, bright location with indirect sunlight.
- Avoid direct sunlight, which can be too harsh for the new cutting.
- Monitor Growth:
- In 4-6 weeks, check for root development by gently tugging on the cutting. Resistance indicates root growth.
- Once roots are established, gradually acclimate the plant to normal indoor conditions by removing the humidity cover for longer periods each day.
- Transplanting:
- When the cutting has developed a strong root system, transplant it into a larger pot with regular potting mix.
- Continue to care for the new Dipladenia plant as you would a mature plant.
Tips:
- Propagate Dipladenia in spring or early summer for the best results.
- Ensure good air circulation around the cutting to prevent fungal issues.
- Be patient, as rooting can take several weeks.
By following these steps, you can successfully propagate Dipladenia and enjoy more of these beautiful plants in your garden or home.
Dipladenia Benefits
Following are the lot of benefits of Dipladenia that you must know:
1. Aesthetic Appeal
Dipladenia, also known as Mandevilla, is renowned for its stunning, vibrant flowers that come in shades of pink, red, and white. These flowers are trumpet-shaped and can add a tropical touch to gardens, patios, and indoor spaces.
2. Long Blooming Period
One of the significant advantages of Dipladenia is its extended blooming season. These plants can flower from spring through fall, providing continuous color and beauty for several months.
3. Low Maintenance
Dipladenia is relatively low maintenance, making it an excellent choice for both novice and experienced gardeners. They are drought-tolerant once established and do not require frequent watering.
4. Versatility
Dipladenia can be grown in various ways: as a climbing vine, in hanging baskets, or as a potted plant. This versatility allows for creative landscaping and decorating options.
5. Attracts Pollinators
The vibrant flowers of Dipladenia attract pollinators such as bees, butterflies, and hummingbirds, contributing to a healthy garden ecosystem.
6. Heat Tolerance
Dipladenia thrives in warm climates and can tolerate high temperatures, making it ideal for regions with hot summers.
7. Compact Growth
Compared to its close relative, the Mandevilla, Dipladenia tends to have a more compact growth habit. This makes it suitable for smaller spaces and container gardening.
8. Disease Resistance
Dipladenia is relatively resistant to common plant diseases and pests, reducing the need for chemical interventions and making it an environmentally friendly choice.
9. Evergreen Foliage
In addition to its beautiful flowers, Dipladenia has attractive, glossy green leaves that remain evergreen in mild climates, adding year-round interest to the garden.
10. Air Purification
Like many indoor plants, Dipladenia can help improve indoor air quality by absorbing pollutants and releasing oxygen, creating a healthier living environment.
Common Pests and Diseases of Dipladenia & Preventation
Pests
- Aphids:
- Symptoms: Yellowing leaves, stunted growth, and sticky residue (honeydew) on leaves.
- Control: Insecticidal soap, neem oil, or a strong stream of water to dislodge them.
- Spider Mites:
- Symptoms: Tiny webbing on the plant, yellow or bronze-colored leaves.
- Control: Increase humidity, insecticidal soap, neem oil, or miticides.
- Whiteflies:
- Symptoms: Yellowing leaves, sticky honeydew, and sooty mold growth.
- Control: Yellow sticky traps, insecticidal soap, or neem oil.
- Mealybugs:
- Symptoms: White, cottony masses on stems and leaves.
- Control: Rubbing alcohol on a cotton swab, insecticidal soap, or neem oil.
- Scale Insects:
- Symptoms: Brown or black bumps on stems and leaves.
- Control: Horticultural oil, insecticidal soap, or neem oil.
Diseases
- Root Rot:
- Cause: Overwatering or poorly draining soil.
- Symptoms: Wilting, yellowing leaves, and blackened roots.
- Control: Improve drainage, reduce watering, and use a fungicide if necessary.
- Powdery Mildew:
- Cause: Fungal infection, often in high humidity.
- Symptoms: White, powdery coating on leaves and stems.
- Control: Fungicidal spray, improving air circulation, and reducing humidity.
- Leaf Spot:
- Cause: Fungal or bacterial infection.
- Symptoms: Brown or black spots on leaves, often with a yellow halo.
- Control: Remove affected leaves, improve air circulation, and use a fungicide.
- Botrytis Blight (Gray Mold):
- Cause: Fungal infection, often in cool, damp conditions.
- Symptoms: Gray, fuzzy mold on flowers and leaves.
- Control: Remove affected parts, improve air circulation, and use a fungicide.
- Downy Mildew:
- Cause: Fungal infection.
- Symptoms: Yellow patches on leaves with a downy growth on the underside.
- Control: Fungicidal spray, improving air circulation, and reducing humidity.
Preventive Measures
- Proper Watering: Water at the base of the plant, avoiding overhead watering. Ensure soil is well-draining.
- Good Air Circulation: Space plants appropriately and prune to improve airflow.
- Regular Inspection: Check plants regularly for early signs of pests or diseases.
- Healthy Soil: Use well-draining soil and avoid waterlogging.
Cultural Practices
- Sanitation: Remove and destroy infected plant parts to prevent the spread of diseases.
- Fertilization: Avoid excessive nitrogen fertilization, which can make plants more susceptible to pests and diseases.
- Companion Planting: Use companion plants that repel common pests or attract beneficial insects.
